Enrollment Restrictions determine the number and types of devices users can enroll to Intune. To configure Enrollment device limit restrictions, open the Microsoft Intune admin center and use the following procedure:
- In the navigation pane, select Devices > Enroll devices.
- Select Enrollment device limit restrictions, as shown in Figure 3-5.

FIGURE 3-5 Reviewing enrollment device limit restrictions
- Click Create restriction.
- In the Create restriction wizard, enter a Name and Description and click Next.
- In the Device limit dropdown, select the relevant number (between 1 and 15) and click Next.
- Select optional scope tags from the Scope tab, and then select Next.
- On the Assignments tab, assign the restriction as usual and select Next.
- On the Review + create tab, select Create.
To create a device platform restriction, use the following procedure:
- In the navigation pane, select Devices > Enroll devices.
- Select Enrollment device platform restrictions.
- Select the appropriate tab:
• Android restrictions
• Windows restrictions
• MacOS restrictions
• iOS restrictions - Click Create restriction.
- In the Create restriction wizard, enter a Name and Description and click Next.
- On the Platform settings tab shown in Figure 3-6, configure the following, and click Next:
• MDM Choose Allow or Block.
• Allow min/max range Enter the operating system version numbers for the platform selected.
• Personally owned devices Choose Allow or Block.

FIGURE 3-6 Configuring a Windows platform restriction
7. On the Scope tab, select optional scope tags, and then select Next.
8. On the Assignments tab, assign the restriction as usual, and then select Next.
9. On the Review + create tab, select Create.
When multiple restrictions are configured, remember that the device must comply with the highest priority restriction assigned to its user.
Note What are Scope Tags?
Scope tags are text labels you can create and assign throughout Intune. They’re used in conjunction with role-based access control. They can also be very useful to target configuration settings more accurately. You create the scope tags in Tenant administration under Roles > Scope tags.
Configure Device Categories
Categories help you when you are using reporting tools. Users select a suitable category during enrollment. To configure device categories, from the Microsoft Intune admin center, select the Devices node, and then use the following procedure:
- On the Devices blade, select Device categories.
- Select Create device category.
- On the Create device category blade, enter a suitable name in the Name box.
- In the Description box, enter a meaningful description of your category.
- Select Next, and on the Scope tab, enter any scope tags and select Next.
- On the Review + create tab, select Create.
After you have created all the appropriate Device categories, as shown in Figure 3-7, users must select from the listed categories when they enroll devices. You can modify the device category for an enrolled device from the Properties page in the device details for a selected device.
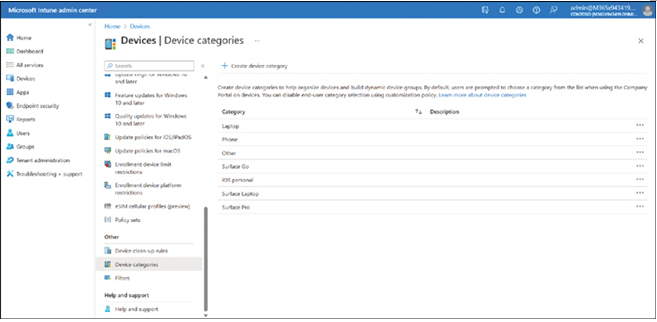
FIGURE 3-7 Defining device categories
You can also use these categories to create dynamic groups in Azure AD. Dynamic groups have a membership based on the result of a query. For example, you could create a dynamic group called “Kiosk device” that had a membership based on the result of the following query:
device.deviceCategory -eq “Kiosk device”